


A thought-out and robust content production process is necessary to create any content, regardless of scale and scope. If you don’t have a process to rely on, it will only serve to delay your content projects and result in an ad-hoc publishing schedule peppered with inconsistent and poorly executed content.
Ultimately, it means that the content you create won’t help you to achieve any business goals — or fulfill the needs of your audience via great content experiences.


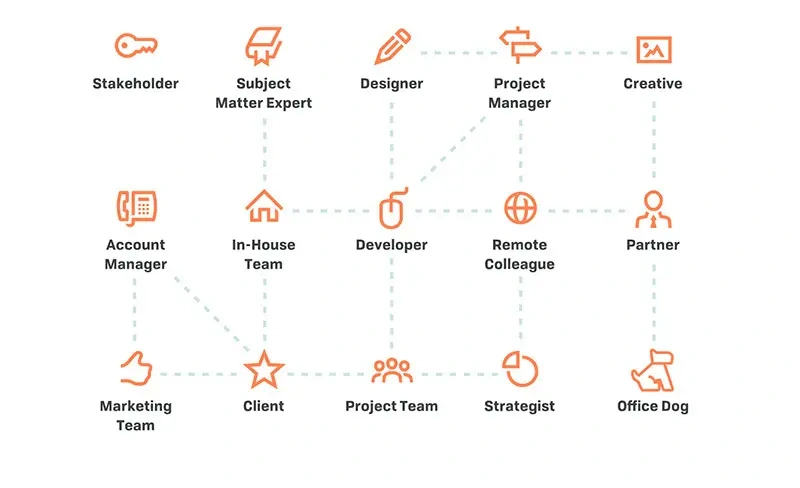
Creating a content production process, collaboratively
By creating a solid content production process, you can ensure that every person on your team knows:
- The goals they’re working towards
- Tasks they need to complete
- Time allocated for them
- Any due dates
- Other team members they depend on
- Where each piece of content lives
To scale and streamline your process, you need to establish a solid process; one that can withstand the content challenges that your team and business regularly go through.
Get your content team together along with a way to document your thoughts — a whiteboard, a blank wall with post-its, a spreadsheet, or Bynder’s Content Workflow.
You will now create your content production process by defining each of the six factors involved:
- The goal
- The tasks
- The roles
- The order
- The timeline and due dates
- The content inventory
Let’s look at each of them in more detail and go through the actions you need to take for each factor.
1. The goal of your content
If your content is not mapped to your business goals and audience needs, there’s no process that can help you move your business in the direction you want.
But, when each piece of your content has a defined business goal, you have the power to measure its performance and optimize your future efforts. For example, knowing whether your content aims to increase your search rankings, brand awareness, lead generation or anything else of importance to your business will help you to make an actual difference with this content.
How to define your content goals
The best time to assign goals to each piece of your content is at the topic planning stage. Defining goals could also happen during a discovery or kick-off phase for website projects.
Planning your content topics ‘in bulk’ is the most common and efficient way to define your content calendar for the quarter ahead — or even for the entire year.
For instance, after you list 13 blog post topics for the first quarter of next year, use the space next to your topics column to add a goal for each topic. When you list all 13 goals — some of which will expectedly appear more than once — review your list and see if it aligns with your overall marketing.
So, if your overarching goal is to increase lead generation by 15% but the majority of the goals you assigned to your topics are aimed at growing brand awareness, you will need to go back to your topic planning with this goal in mind.
This is also the reason why it’s time well spent to try and plan at least a quarter ahead. It gives you a chance to review the effect your content will have on the big picture and some time to revisit and adjust your entire content marketing strategy based on that.
2. The tasks for your content production process
Not knowing the tasks involved in your content production process can delay and derail projects with content never getting published on time, or at all.
When you set aside the time for writing and editing, but not for design and revisions, you may suddenly need extra time from other content stakeholders that simply may not be possible. This results in delays and lots of frustration.
How to define them
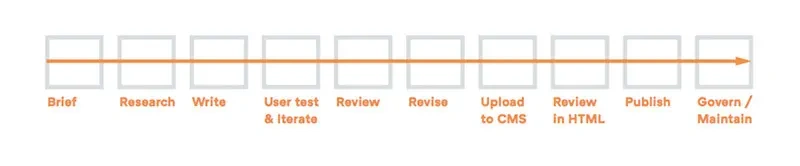
List every single action that needs to happen in order for a piece of content to move from the ‘brief’ stage through to the ‘approved’ and ‘published’ stages.
Sounds simple (and obvious), but it’s easy to forget about certain steps, and particularly any sub-steps, so go ahead and list everything that happens during your production process.
A good approach here is to be as detailed as possible and not try to consolidate any of the stages just yet. For example, list every single type of revision stage you need to go through, like copy revision, headline revision, graphics revision, instead of simply listing ‘’make revisions’ as a task.
Don’t forget other stages like fact-checking, proofreading, translation, or legal review, too — they’re all important to capture so that you can refine into a more robust process later on. Ask others to give your list a sense-check so you can be sure that no task is missing. When that’s done, you’re ready for the next step.
3. The roles in your content production process
This step is about assigning each of the tasks to the person who is responsible for getting it done. Without clear responsibilities being allocated, more than just your deadline is at risk as it can soon become a battleground for blame-shifting and unhealthy team relationships.
How to define these
Go to your task list from the previous step and add a name next to each task. Make sure everyone involved is on the same page, by being transparent with each team member and seeking their agreement on the scope of their responsibilities.
If you find that there is more than one person responsible for a single task, see if there are multiple subtasks you can break that task into. This way, you’ll ensure there is no confusion as to who is in charge of which specific part of that task.
The only situation that makes this step redundant is when you are the only person involved in the process. Even then, you shouldn’t skip any of the remaining steps...
4. The order of your content production process
If the order of tasks in your content production process is incorrect or broken, you will soon risk some people involved in the chain becoming confused or even neglecting to play their part in a timely fashion.
Instead, you need to operate a clear, content process containing stages that sit in a logical order. This ensures that all content creation stakeholders can maximize their time and work efficiently helping to shorten overall content production lead times.
How to define the content production process
Go back to your task list — for each task, you need to ensure that:
- No tasks preceding that specific task depend on it, and;
- That specific task doesn’t depend on any of the tasks after it being completed first
Here is a simple example:
- Let’s say that you have two people who look after all graphic elements for your content.
- One of them sources photography and graphics, while the other edits them based on your brand guidelines.
- It means that the task to ‘edit images’ should never come before ‘sourcing images’, otherwise, one person will be waiting forever for the other one to complete their task…
Another time-saving activity is to look at the entire chain of your content production stages and look for any tasks that can be done concurrently.
For example, while your copy might still be in its second revision, the person in charge of sourcing images can probably get started on that task.
5. The timeline and due dates
This is the final building block for an effective content production process. It’s what glues all the pieces we mention above into a repeatable process; one which can be clearly defined by dates and milestones.
How to define content timelines
Each of your tasks now has its owner and is positioned correctly. It’s now time to work with each of the task owners to add the estimated time it takes for a specific task to be finished. If this is your first time mapping out your production process, make sure that you’re keeping these times rounded up at first.
For example, if you and the task owner believe it takes 45 minutes to complete a task, round it up to an hour. This is also the best time to look into whether any tasks can be consolidated — and the estimated time it would take to complete them (obviously, you’ll only want to do this when multiple tasks are of a similar nature and a single person is in charge of them).
This will also give you a clearer overview of the entire process and everyone involved.
Next, spend some time mapping out tasks — tracking backwards from your publish date.
For example, let’s say you want to publish a piece of content every Tuesday, and you want to have it in your CMS by Friday of the previous week. Working backwards may look something like this:
- Blog post goes live (every Tuesday)
- Schedule blog post for publishing in CMS: 4 days before (Friday)
- Write and schedule social messages: 5 days before (Thursday)
- Insert graphics into post: 7 days before (Tuesday)
- Design header, body and social media graphics: 8 days before (Monday)
- Second revision and final proofread: 11 days before (Friday)
- First revision: 13 days before (Wednesday)
- First draft: 15 days before, (Monday)
…and so on.
Work with everyone involved in the process so that you can refine timescales to be as accurate as possible. By doing this, those involved will also get a clear picture of what amount of time needs to be allocated for content production each week.
The best thing about this? The more you go through this process, the better you;ll get. Over time, you may realize you can consolidate more tasks. You may be able to coordinate roles that can work closely together to get something done faster. You could decide to allow for more time for reviews and quality checks to help ensure maximum value is being delivered to your audience.
6. The content inventory
Content inventory responsibilities must now be defined so you never misplace a piece of content. Just like responsibilities over tasks, each team member should be certain about their role in the content inventory.
How to work on this
Most of the tasks you’ve already defined will come with a specific addition or a change to your content inventory. For example:
- The person in charge of writing the first draft will create a document that will contain that draft
- The person reviewing it will make changes to that same file
- The person sourcing your images will share it with the person in charge of editing those images
- That person then needs to store the new graphics they create somewhere
- The person who will upload them to CMS needs to access them and write social updates for that piece of content
So your action in this final phase is to assign a ‘content inventory responsibility’ — if there is one associated with the task, of course — to each of the tasks.
So, if the task is ‘Write 10 headline versions: 11 days before Friday’, you can add the subtask: ‘Create a Headlines file in the post’s folder’ to it.
The specifics will depend on whatever system you use to organize your files, but by including this as part of your content production process, no one will ever wonder why there isn't a file available when they need it!
Wrapping it all up
Using a solid content production process will get you firmly on the path to creating high-quality content without delays, pushbacks, misunderstandings, and frustrations. The best place to start is to look at your most recent content and audit the actions that led up to it, taking note of:
- Any delays that happened
- Anything that was put on hold because it depended on another team member
- The state of your content inventory and any fixes to it you had to make after publishing that content
- Any occasions where ownership over a task wasn’t clear
The list that you’re left with, as a result, is your set of identified ‘weak spots’. Now, set aside several hours with your team (or for yourself if you’re working on all stages by yourself) and go through the six steps with these weak spots in mind. Complete all the tasks and document everything you discuss, and then, you’re ready to implement your new process for the first time and grow it into a fully challenge-resistant process.
Bynder’s Content Workflow is designed to help marketers create and scale quality content; making it as easy as possible to organize written content and locate your content assets, whilst also allowing users to create custom workflows and seamlessly collaborate with all of their content stakeholders.
And now, with AI capabilities added to Content Workflow, users can harness the power of AI for their content creation — whilst ensuring the right safeguards, checks, and transparency measures are firmly in place.